
جدول محتوایی
در این مقاله به نحوه نصب Drupal روی Ubuntu خواهیم پرداخت با ما همراه باشید.
معرفی
دروپال یک سیستم مدیریت محتوا (CMS) برای نگهداری و انتشار یک وب سایت اینترنتی است. این یک سیستم مدیریت محتوای متن باز (CMS) با یک جامعه بزرگ و حمایتی است. میلیون ها نفر و سازمان در سراسر جهان از آن برای ساخت و نگهداری وب سایت های خود استفاده می کنند.
سیستم را به روز کنید
اجازه دهید با اجرای دستورات زیر، بسته های سیستم را به آخرین به روز رسانی کنیم.
apt update -y

apt upgrade -y
سرور MariaDB را نصب کنید
مرحله بعدی نصب MariaDB یا MySQL است. من از MariaDB برای این فرآیند استفاده خواهم کرد. پس بیایید MariaDB را با دستور زیر نصب کنیم.
apt install -y mariadb-server mariadb-clientسرور پایگاه داده خود را با تنظیم رمز عبور ریشه، غیرفعال کردن ورود از راه دور ریشه و حذف پایگاه داده های آزمایشی ایمن کنید.
mysql_secure_installation
خروجی :
root@crown:~# sudo mysql_secure_installation

NOTE: RUNNING ALL PARTS OF THIS SCRIPT IS RECOMMENDED FOR ALL MariaDB
      SERVERS IN PRODUCTION USE!  PLEASE READ EACH STEP CAREFULLY!

To log into MariaDB to secure it, we'll need the current
password for the root user.  If you've just installed MariaDB, and
you haven't set the root password yet, the password will be blank,
so you should just press enter here.

Enter current password for root (enter for none):
OK, successfully used password, moving on...

Setting the root password ensures that nobody can log into the MariaDB
root user without the proper authorisation.

You already have a root password set, so you can safely answer 'n'.

Change the root password? [Y/n] y
New password:
Re-enter new password:
Password updated successfully!
Reloading privilege tables..
 ... Success!

By default, a MariaDB installation has an anonymous user, allowing anyone
to log into MariaDB without having to have a user account created for
them.  This is intended only for testing, and to make the installation
go a bit smoother.  You should remove them before moving into a
production environment.

Remove anonymous users? [Y/n] Y
 ... Success!

Normally, root should only be allowed to connect from 'localhost'.  This
ensures that someone cannot guess at the root password from the network.

Disallow root login remotely? [Y/n] Y
 ... Success!

By default, MariaDB comes with a database named 'test' that anyone can
access.  This is also intended only for testing, and should be removed
before moving into a production environment.

Remove test database and access to it? [Y/n] y
 - Dropping test database...
 ... Success!
 - Removing privileges on test database...
 ... Success!

Reloading the privilege tables will ensure that all changes made so far
will take effect immediately.

Reload privilege tables now? [Y/n] y
 ... Success!

Cleaning up...

All done!  If you've completed all of the above steps, your MariaDB
installation should now be secure.

Thanks for using MariaDB!
بررسی کنید که میتوانید بهعنوان یک کاربر ریشه با مجموعهای از رمز عبور وارد پایگاه داده شوید.
mysql -u root -pاکنون که میتوانیم به عنوان کاربران عادی وارد سیستم شویم، اکنون میتوانیم یک پایگاه داده دروپال ایجاد کنیم که دروپال پس از نصب آن در سیستم خود، از آن استفاده کند. برای ایجاد یکی با استفاده از دستور زیر.
ایجاد پایگاه داده برای دروپال
یک پایگاه داده برای دروپال ایجاد کنید و تمام امتیازات را به کاربر دروپال بدهید.
mysql -u root -p
CREATE DATABASE drupal;
CREATE USER 'drupal_user'@'localhost' IDENTIFIED BY 'password';
GRANT ALL PRIVILEGES ON drupal.* to drupal_user@'localhost';
FLUSH PRIVILEGES;
\q
رمز عبور واقعی و قوی را جایگزین کلمه عبور کنید.
خروجی :
Enter password:
Welcome to the MariaDB monitor.  Commands end with ; or \g.
Your MariaDB connection id is 41
Server version: 10.6.9-MariaDB-1 Ubuntu 22.10

کپیright (c) 2000, 2018, Oracle, MariaDB Corporation Ab and others.

Type 'help;' or '\h' for help. Type '\c' to clear the current input statement.

MariaDB [(none)]> CREATE DATABASE drupal;
Query OK, 1 row affected (0.001 sec)

MariaDB [(none)]> CREATE USER 'drupal_user'@'localhost' IDENTIFIED BY 'password';
Query OK, 0 rows affected (0.003 sec)

MariaDB [(none)]> GRANT ALL PRIVILEGES ON drupal.* to drupal_user@'localhost';
Query OK, 0 rows affected (0.002 sec)

MariaDB [(none)]> FLUSH PRIVILEGES;
Query OK, 0 rows affected (0.001 sec)

MariaDB [(none)]> \q
Bye
PHP را نصب کنید
به طور پیش فرض، اوبونتو 22.10 با PHP نسخه 8.1 ارائه می شود. ما PHP و سایر ماژول های لازم برای اجرای دروپال را نصب خواهیم کرد.
apt install php php-{cli,fpm,json,common,mysql,zip,gd,intl,mbstring,curl,xml,pear,tidy,soap,bcmath,xmlrpc}خروجی :
root@crown:~# apt install php php-{cli,fpm,json,common,mysql,zip,gd,intl,mbstring,curl,xml,pear,tidy,soap,bcmath,xmlrpc}
Reading package lists... Done
Building dependency tree... Done
Reading state information... Done
php is already the newest version (2:8.1+92ubuntu1).
php-cli is already the newest version (2:8.1+92ubuntu1).
php-json is already the newest version (2:8.1+92ubuntu1).
php-common is already the newest version (2:92ubuntu1).
php-mysql is already the newest version (2:8.1+92ubuntu1).
php-zip is already the newest version (2:8.1+92ubuntu1).
php-gd is already the newest version (2:8.1+92ubuntu1).
php-mbstring is already the newest version (2:8.1+92ubuntu1).
php-curl is already the newest version (2:8.1+92ubuntu1).
وب سرور آپاچی را نصب کنید
در مورد وب سرور، ما از آپاچی استفاده خواهیم کرد زیرا پیکربندی و استفاده از آن آسان است.
برای نصب، دستورات زیر را اجرا کنید
apt install apache2 libapache2-mod-phpخروجی :
root@crown:~# apt install apache2 libapache2-mod-php
Reading package lists... Done
Building dependency tree... Done
Reading state information... Done
apache2 is already the newest version (2.4.54-2ubuntu1).
libapache2-mod-php is already the newest version (2:8.1+92ubuntu1).
0 upgraded, 0 newly installed, 0 to remove and 1 not upgraded.
منطقه زمانی PHP و محدودیت حافظه را به روز کنید.
منطقه زمانی را که می خواهید دروپال به عنوان پیش فرض استفاده کند، وارد کنید.
nano /etc/php/*/apache2/php.ini
memory_limit = 256
date.timezone = UTC
آخرین نسخه دروپال را دانلود کنید و آن را در اوبونتو 22.10 استخراج کنید.
wget https://www.drupal.org/download-latest/tar.gz -O drupal.tar.gz
tar xvf drupal.tar.gz
mv drupal-*/  /var/www/html/drupal
مالکیت دایرکتوری دروپال را به کاربر و گروه آپاچی به روز کنید.
 chown -R www-data:www-data /var/www/html/
 chmod -R 755 /var/www/html/
پیکربندی وب سرور آپاچی برای دروپال
یک فایل پیکربندی برای دروپال ایجاد کنید.
nano /etc/apache2/sites-available/drupal.confمطالب زیر را اضافه کنید
نام دامنه واقعی خود را جایگزین example.com کنید. اگر دامنه ای ندارید، می توانید به جای آن آدرس IP سرور را وارد کنید
<VirtualHost *:80>
     ServerName example.com
     ServerAdmin admin@example.com
     DocumentRoot /var/www/html/drupal/

     CustomLog ${APACHE_LOG_DIR}/access.log combined
     ErrorLog ${APACHE_LOG_DIR}/error.log

      <Directory /var/www/html/drupal>
            Options Indexes FollowSymLinks
            AllowOverride All
            Require all granted
            RewriteEngine on
            RewriteBase /
            RewriteCond %{REQUEST_FILENAME} !-f
            RewriteCond %{REQUEST_FILENAME} !-d
            RewriteRule ^(.*)$ index.php?q=$1 [L,QSA]
   </Directory>
</VirtualHost>
با استفاده از دستورات زیر وب سایت را پیکربندی و فعال کنید
apachectl -t
a2dismod mpm_event
a2enmod mpm_prefork
a2enmod php8.1
a2enmod rewrite
a2ensite drupal.conf
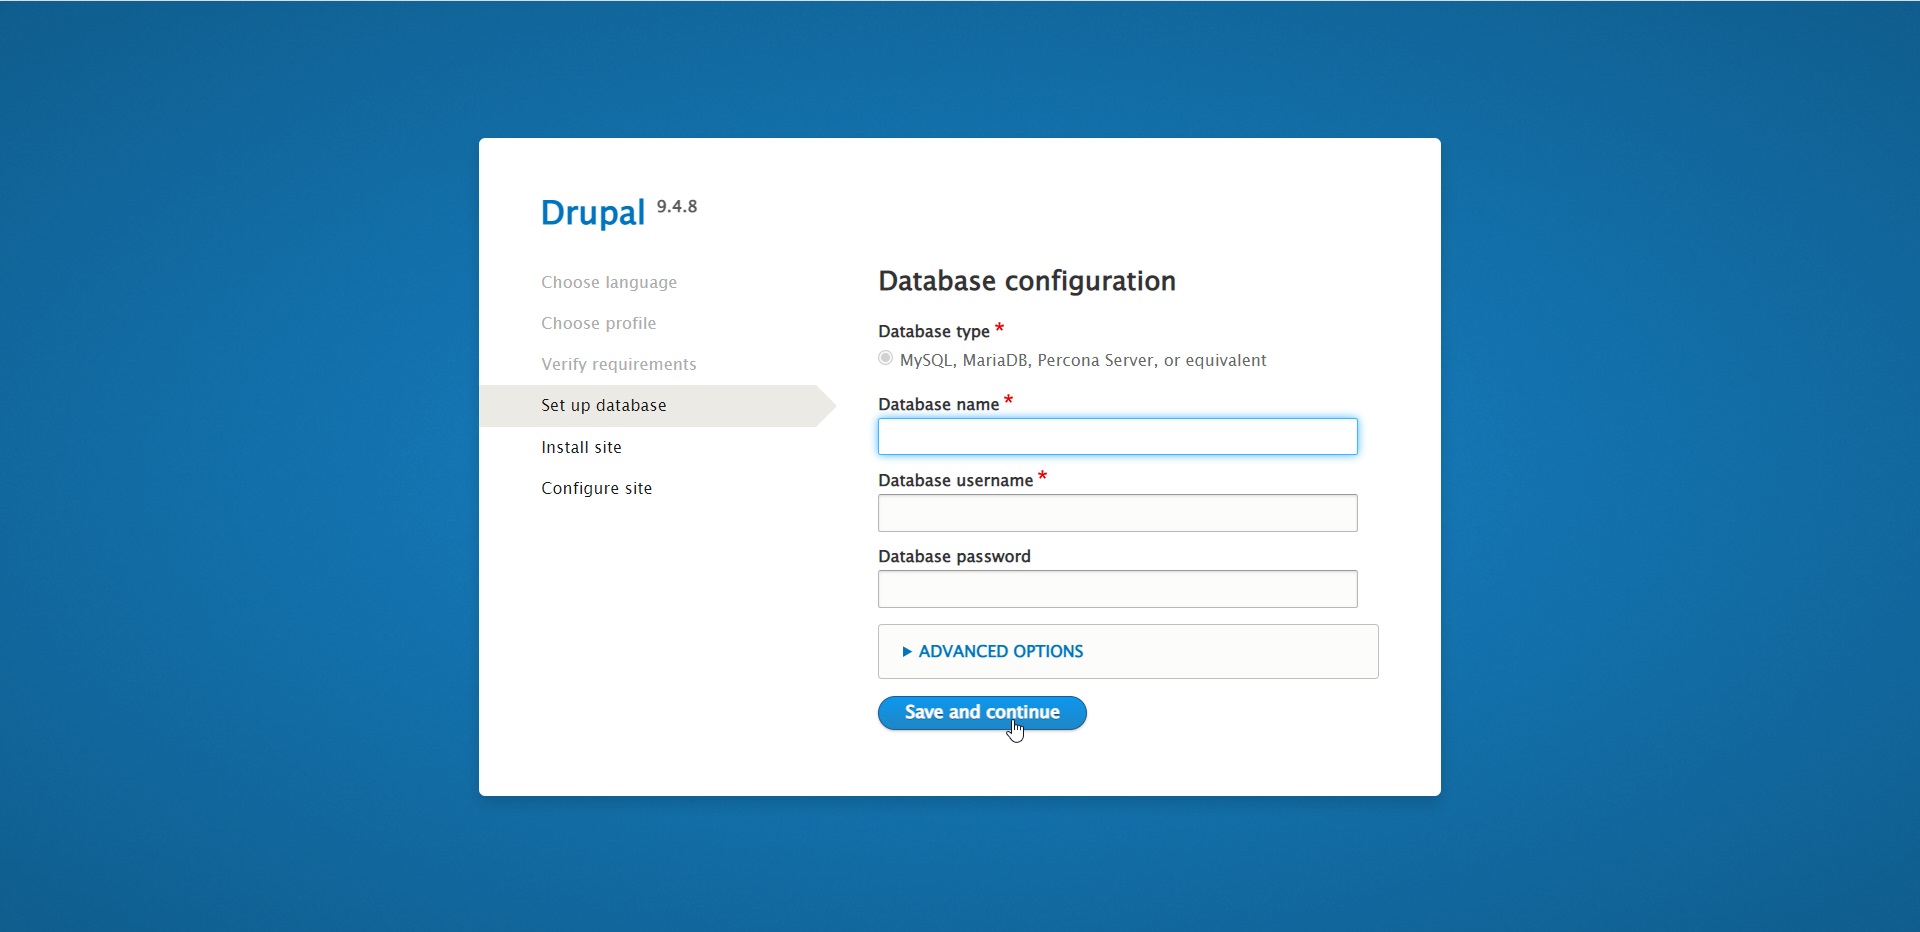
systemctl restart apache2دروپال را در اوبونتو از مرورگر بررسی و نصب کنید.
با استفاده از http://example.com به صفحه پیکربندی دروپال دسترسی پیدا کنید
دامنه واقعی خود یا آدرس IP سرور را جایگزین example.com کنید.
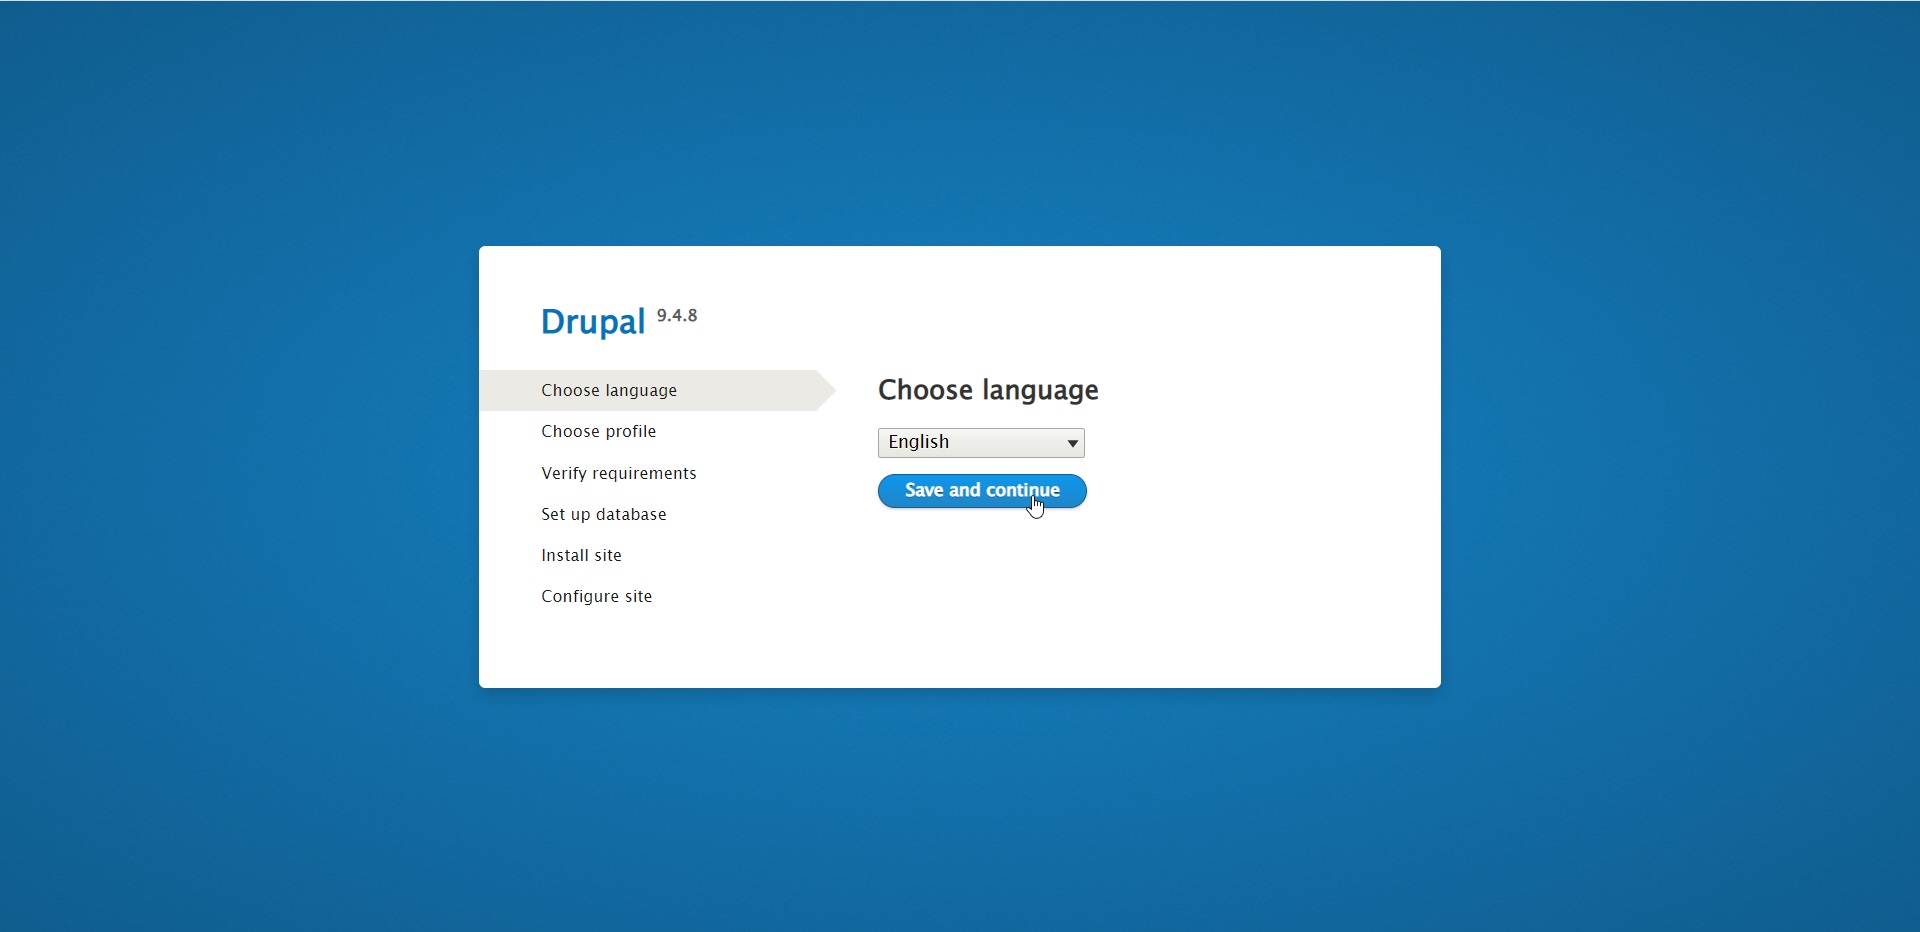
نمایه نصب را انتخاب کنید.
پیکربندی پایگاه داده را برای دروپال تنظیم کنید.
صبر کنید تا نصب کامل شود

سایت خود را پیکربندی کنید

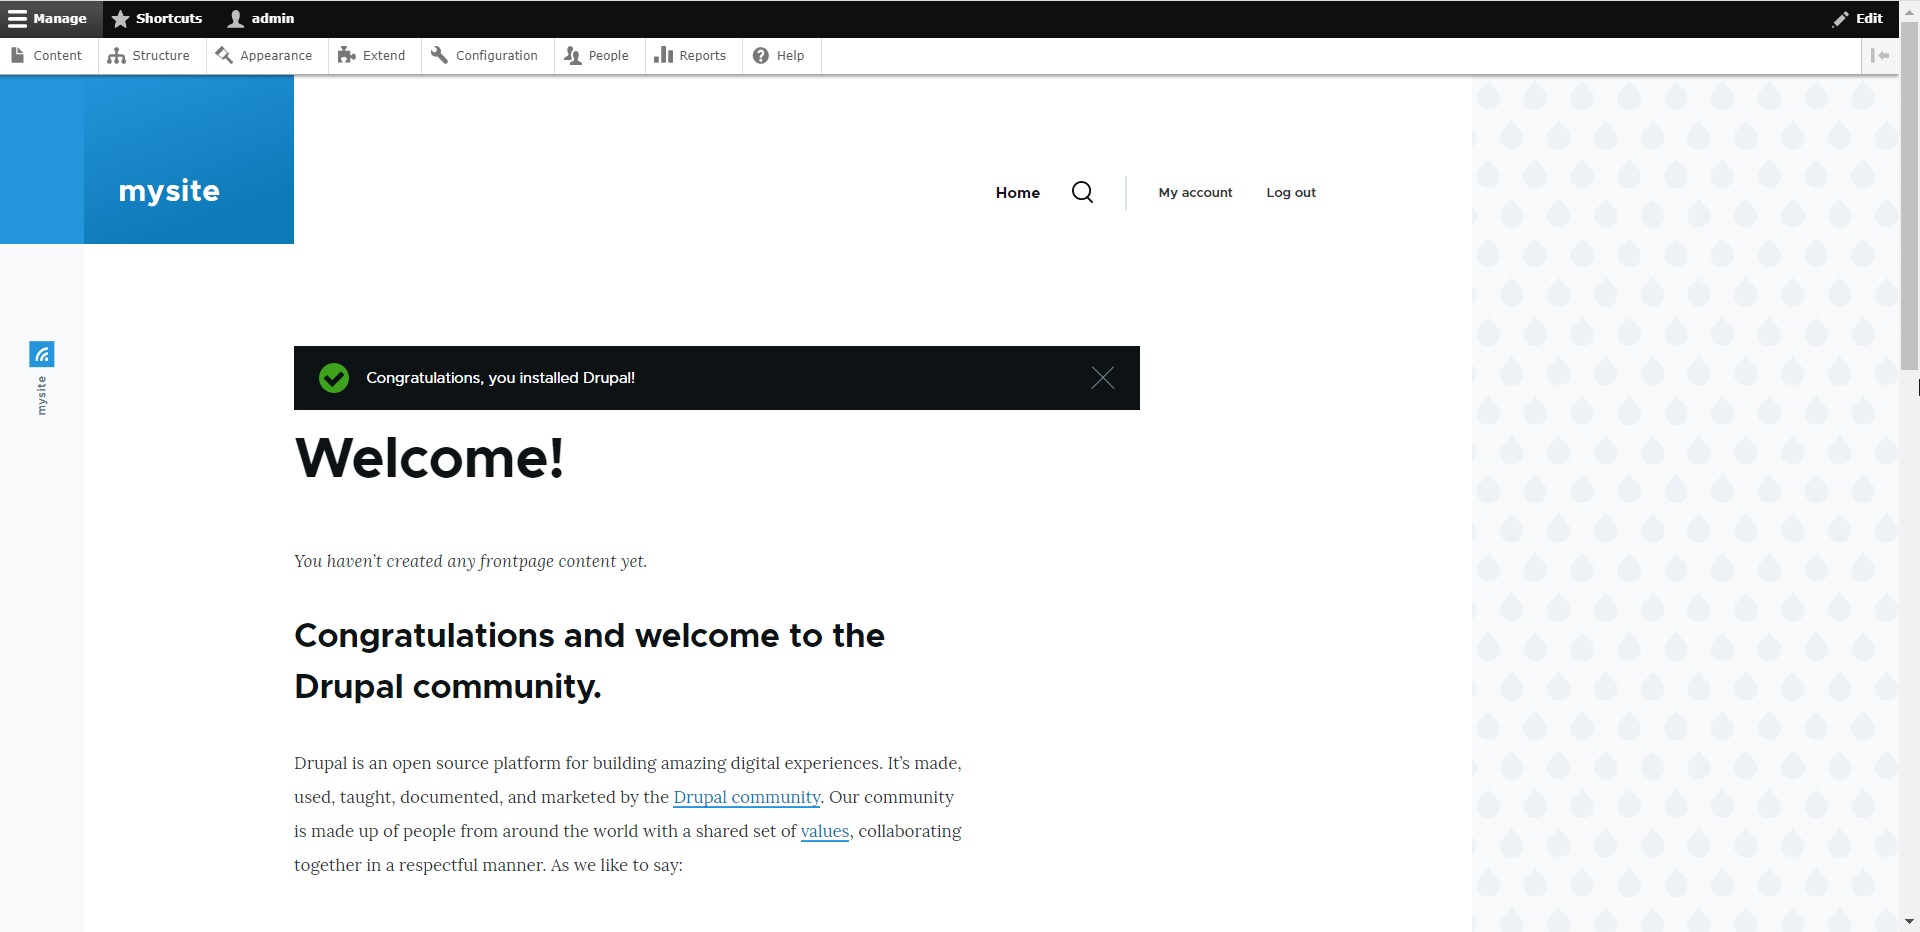
بعد از چند دقیقه به داشبورد دروپال خواهید رسید
ممنون که مثل همیشه همراه ما بودید با نصب Drupal روی Ubuntu موفق و سربلند باشید D: